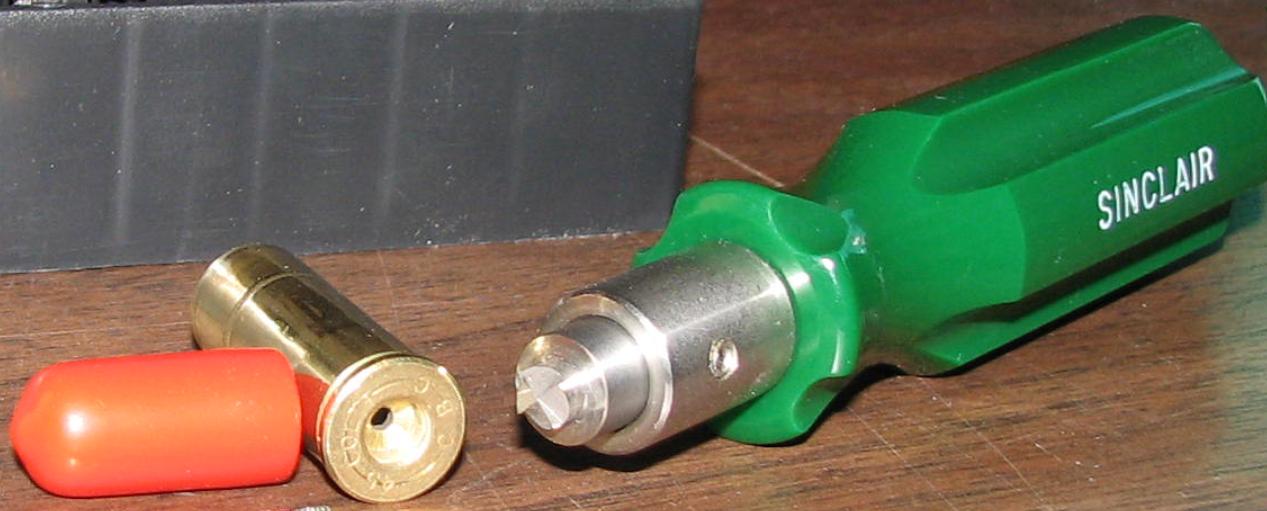
The Static Cling post talks about how to control dust in case tumblers using scented fabric softener. This is a follow up post to talk about the tumblers themselves. There are two basic types. The vibrators and the rotary tumblers. Both have their uses and will do the job. I believe the rotary tumblers will last the longest, but they cost more. They also will seal so that liquid media can be used. Most vibrators have the motor attached to the bottom of the bowl such that they will leak liquid on to the motor, thus they are not recommended for liquid media.

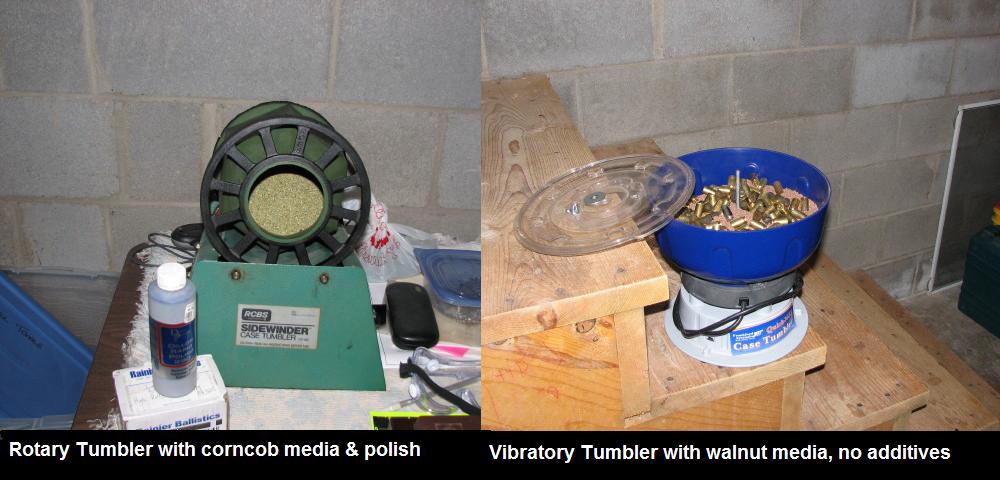
Over the years I have evolved the following generic cleaning method. Toss the brass (after sorting to avoid mixing calibers) into the vibrator and walnut shell media. My vibrator cleaner is the smallest size so it does not do well with a massive number of cases. In the picture below, the vibrator cleaner is on the right, and is shown with a hundred 45 ACP cases. For larger cases, like 45 colt, I only clean 50 at a time, or 25 rifle cases. I run them for about three hours. It cleans them fairly well, but I prefer a new, shiny look. For that, I use the rotary tumbler with a small amount of liquid polish (I use Dillon Rapid Polish 290) added to the corncob media, which does a fine clean and spiffy polish. I run the rotary about an hour. That is after the basic first clean. The rotary is on the left side of the picture below.

Case Tumblers

Tumblers

The two step procedure I use can be accomplished with only one case cleaner, but you will be constantly changing the media back and forth, and liquid additives are a risk with the vibrators. (Just use a tiny amount and let it absorb in the media before turning on the vibrator type.)

The rotary tumbler has seen many uses (including lapidary work) and is 25 years old. The vibratory tumbler is about a year old and has failed twice. Both times, the power lead to the motor broke at the solder joint and was re-soldered. This was due to lack of vibration protection of the motor wire connections. I suspect most vibrators will be susceptible to this failure mode. The rotary occasionally fails due to the metal roller gears wearing the plastic bin edges smooth. I correct this with quarter inch flexible door seal tape and it works great for about six months till the tape wears off and needs replacing.

When I first began reloading, it was the priming process that gave me the most grief. Every manual I consulted said that primers need be inserted such that they were about 4 thousands of an inch
below flush with the base of the case. Many were the suggestions about primer insertion tools but nowhere could I find anything about what to do if the primers would not seat even flush, much
less below that level. It seemed logical to me that high primers were a very bad thing even before I had been introduced to information about “slam-fires”. I had so many high primers that my early reloads were fired single shot in both revolvers and automatics. My first attempt to solve the problem was to really look at a de-primed case and figure that the sludge left in the primer hole was enough to prevent a new primer from seating correctly. I invested in about every primer pocket cleaner on the market, but to no avail. I even started tumbling de-primed brass just to clean the primer pockets. I also tried every brand of primer I could find.
I tried re-seating primers with much greater force, which would bring them flush but deformed looking.  That is with a ram-prime style tool. I broke several Lee Hand Primers trying this technique. I finally stumbled across an article, Guns and Ammo I believe, that talked about how brass cases in the primer area should deform slightly when fired, and would thus need some “repair” before reloading. Now that worked. Here it is.

Problem: High primers or primers that cannot be seated below flush with the base of the case. Cause suspected to be a deformed or slightly shortened primer pocket.

Solution: Primer pocket uniformer tool, not to be confused with pocket cleaners or military crimp removing tools. The uniformer will hand machine (or by drill with appropriate attachment) a primer pocket back to the specified depth for the specific primer size used. I tried the most inexpensive first. Yep, cured the problem right off. But the tool broke with not much use. Same with the next. I ended up with a custom set for large rifle, large pistol (different depth than rifle), and small pistol (same depth as small rifle) with a hand tool from Sinclair. Great, much use, and still going. All my primers compare directly with factory ammo. Throw the pocket cleaners away. These re-machine the pocket brass and that includes the sludge as well.

http://www.sinclairintl.com/product/10922/Primer-Pocket-Tools

See how the pocket shines when the base is set back to specs ? The orange cap is the protective cover to protect the carbide cutting blades.

Primer Pocket Uniformer

This is one of those steps in reloading where it is easy to become paranoid, and if you are, then use the paranoia to focus on safety.

If I were an ammo factory, I would be in a statistically risky business which would demand that I take a statistically altered (very expensive) approach to quality checks throughout the production
process. I do not have that kind of investment capital, but since I am producing ammo for myself, I have a strong motivation to do everything I can to reduce the possible hazards to myself to zero.
I do have an advantage over an ammo factory in that my own time is available to add in exchange for lacking capital to buy all kinds of sensors for QC checks. Hopefully, I can show you how that
works, and use my approach or not, the added safety factors are there.

PROBLEM: I am so paranoid about squib and overcharge loads that I am willing to devote as much additional time to the reloading process as necessary to reduce the probability of such an event occurring at my reloading bench to zero (the goal). To do this, I continue to research the sources of errors in reloading with respect to squibs and overcharges. I believe the primary source to be a combination of the use of powder dispensers and inattention or distraction during the charging process.

SOLUTION: What I have reached is an elimination of the powder dispenser as a means of dumping powder. Since I have a Dillon Progressive, the powder station is still there but kept empty and sealed, since I use that station for case mouth expansion ONLY. After case mouth expansion, I remove all cases (usually in lots of 50 at a time) to a separate bench where I manually dispense powder into the weigh scale one case at a time. Every case is hand-weighed and hand filled. After this, each lot of cases are positioned for inspection and all 50 cases have to look like clones of each other. When these cases come back to the loading bench, each case is examined again before placing the bullet and entering the bullet seating station. As to the weigh scale, it is calibrated before and after each 50 cases by using a mix of precision weights that EXACTLY equals the powder charge weight desired. To illustrate this, in the picture below, I show my scale along with a blowup of the precision weight set for calibration. This whole process adds about 20 minutes of time to the powder charge step (for each lot of 50 rounds), which I consider to be my own version of the equivalent of factory quality check sensors.

Weighing powder

Weighing powder